用GitHub Actions自动发布Hexo网站
参考自:极客吉
名词解释
- Github Actions 是 GitHub 推出的持续集成 (Continuous integration,简称 CI) 服务,基于它可以进行构建、测试、打包、部署项目
- workflow(工作流程):持续集成一次运行的过程
- job(任务):一个 workflow 由一个或多个 job 构成,含义是一次持续集成的运行,可以完成多个任务
- step(步骤):每个 job 由多个 step 构成,一步步完成
- action(动作):每个 step 可以依次执行一个或多个命令(action)
为什么要这样干
- 正常情况下,我们需要在本地开发,本地打包,然后上传构建编译好的包到服务器.有了它,开发完成上传代码到仓库就行,不用在本地构建编译了
- Github pages 对于免费用户来说,必须是公开仓库。有了它,我们可以把代码放在私有仓库,构建好的包放在公共仓库。原始文件和生成的文件隔离,分仓库管理
之前的原始操作流程
- 在原始文件仓库写好文章,并推送到
文章仓库 - 在本地用
hexo generate生成静态文件 - 把静态文件复制到
Pages库,然后提交推送
如果使用Github Actions,就可以自动发布网站了
用GitHub Actions的操作流程
创建两个github仓库:
代码仓库:存放Hexo文件、文章内容、Github Actions的workflow文件网站仓库:构建编译后的文件
大致思路:
代码仓库里创建两个Github Actions的workflow:Build Pages和Publish Pages。Build Pages由master分支的push事件触发。主要功能是用hexo generate生成静态文件,把这些静态文件打包、创建并上传到一个新的 Github Release- 创建release的操作触发
Publish Pages,这个workflow会clone我的网站仓库,下载release里最新的静态文件包,解压到网站仓库目录,然后 commit & push
具体的实现步骤如下:
- 创建
gh_action_build.sh脚本。该脚本在Github Action里运行。主要是调用build.sh,但是事先要安装一些必要的npm库 - 创建
build.sh脚本。该脚本负责生成静态文件、打包、上传到release - 创建
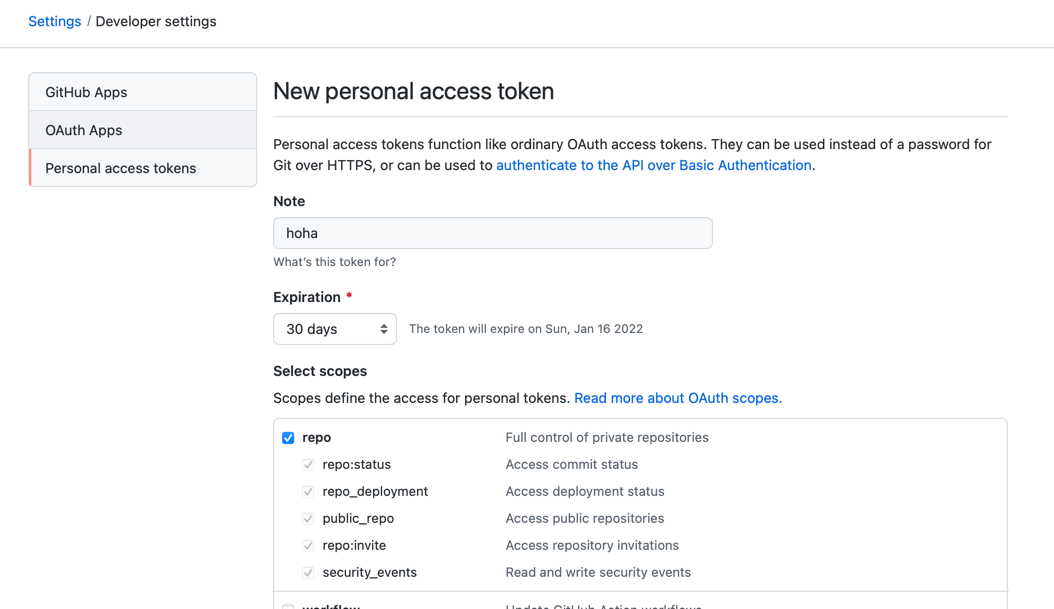
publish脚本。该脚本下载release中最新的静态文件包,解压到网站仓库,commit & push。 - 获取一个Personal access token 和 Deploy keys
build.sh里用到了Github CLI工具gh。这个命令需要用到 Personal access token 来授权publish里用到的pushd命令需要 Deploy keys 授权
Personal access tokens function like ordinary OAuth access tokens. They can be used instead of a password for Git over HTTPS, or can be used to authenticate to the API over Basic Authentication.
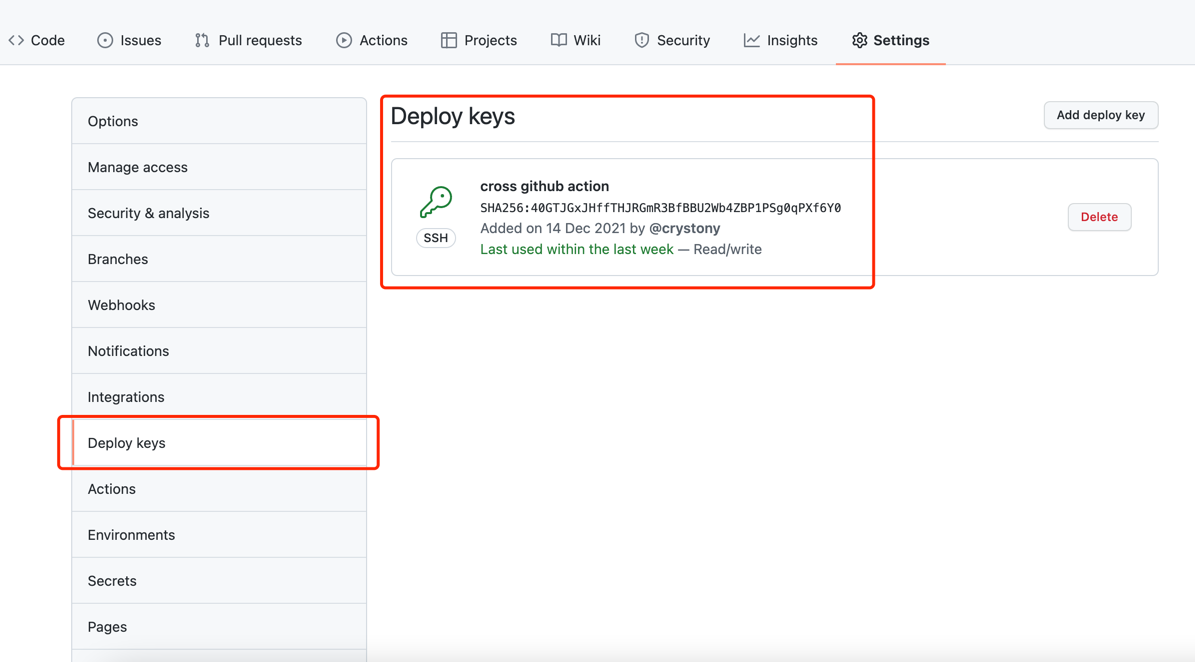
生成 Deploy keys。用ssh-keygen创建一对秘钥。因为我们在代码仓库的actions里操作网站仓库,所以需要授权actions的git命令来修改网站仓库
- 把生成的公钥加到
网站仓库的 deploy key 里,并赋予写权限 - 把生成的私钥加到
代码仓库的 secrets 里
把 Personal access token 和 Deploy keys 添加到
代码仓库的 secrets 里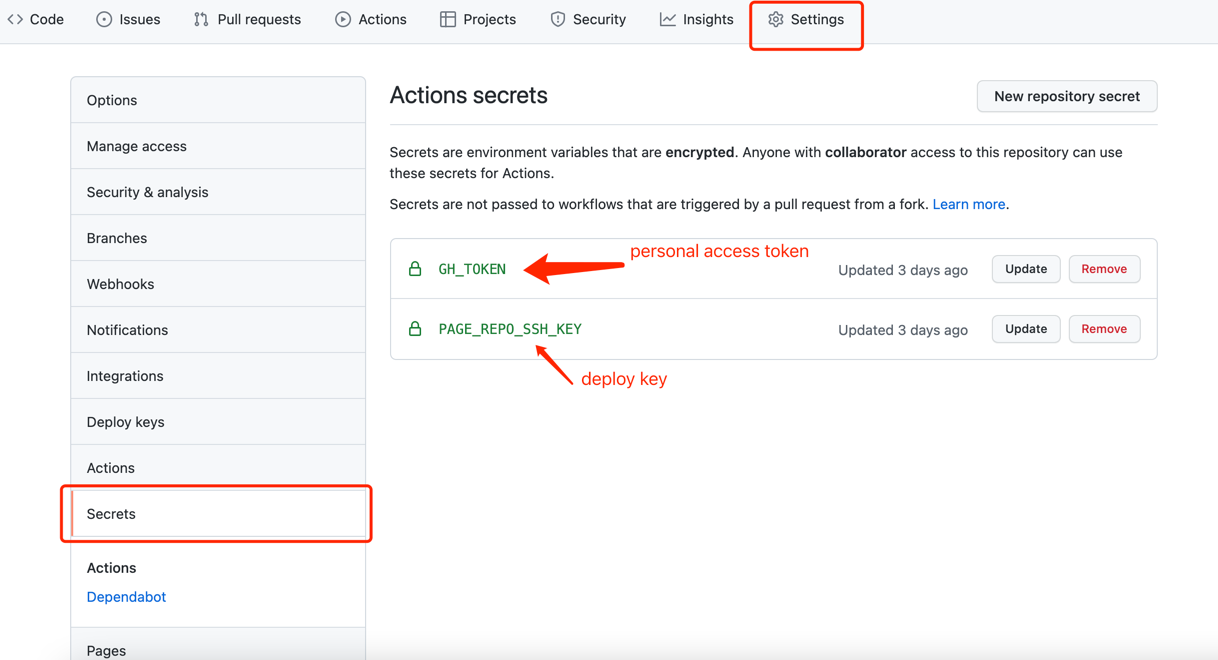
创建 Github Actions 的 workflow :
Build Pages,主要功能就是注入上边的那个token然后调用gh_action_build.sh。参考代码在这里1
2
3
4
5
6
7
8
9
10
11
12
13
14
15
16
17
18
19
20
21
22
23
24
25
26
27
28
29
30
31
32
33
34
35# This is a basic workflow to help you get started with Actions
name: Build Pages
# Controls when the action will run.
on:
# Triggers the workflow on push or pull request events but only for the master branch
push:
branches: [ master ]
# Allows you to run this workflow manually from the Actions tab
workflow_dispatch:
# A workflow run is made up of one or more jobs that can run sequentially or in parallel
jobs:
# This workflow contains a single job called "build"
build:
# The type of runner that the job will run on
runs-on: ubuntu-latest
# Steps represent a sequence of tasks that will be executed as part of the job
steps:
- name: Use Node.js 10
uses: actions/setup-node@v1
with:
node-version: '10'
# Checks-out your repository under $GITHUB_WORKSPACE, so your job can access it
- uses: actions/checkout@v2
# Runs a single command using the runners shell
- name: Generate pages
env:
GITHUB_TOKEN: ${{ secrets.GH_TOKEN }}
run: ${GITHUB_WORKSPACE}/script/gh_action_build.sh创建 Github Actions 的 workflow :
Publish Pages。这个 workflow 里需要 clone 两个仓库,然后调用publish脚本。其中代码仓库的 ssh key 需要用上边设置的私钥。参考代码在这里。1
2
3
4
5
6
7
8
9
10
11
12
13
14
15
16
17
18
19
20
21
22
23
24
25
26
27
28
29
30
31
32
33
34
35
36
37
38
39
40# This is a basic workflow to help you get started with Actions
name: Publish Pages
# Controls when the action will run.
on:
release:
types: [published]
# Allows you to run this workflow manually from the Actions tab
workflow_dispatch:
# A workflow run is made up of one or more jobs that can run sequentially or in parallel
jobs:
# This workflow contains a single job called "build"
build:
# The type of runner that the job will run on
runs-on: ubuntu-latest
# Steps represent a sequence of tasks that will be executed as part of the job
steps:
# Checks-out your repository under $GITHUB_WORKSPACE, so your job can access it
- uses: actions/checkout@v2
with:
repository: '网站库'
ref: pages
path: 'cross-page'
ssh-key: ${{ secrets.PAGE_REPO_SSH_KEY }}
- uses: actions/checkout@v2
with:
repository: '代码库'
path: 'cross'
# Runs a single command using the runners shell
- name: Publish pages
env:
GITHUB_TOKEN: ${{ secrets.GH_TOKEN }}
run: ${GITHUB_WORKSPACE}/cross/script/publish ${GITHUB_WORKSPACE}/cross-page/
完成
这样,我只需要把最新的文章提交到Hexo库的master分支,新文章就自动发布到Github Pages了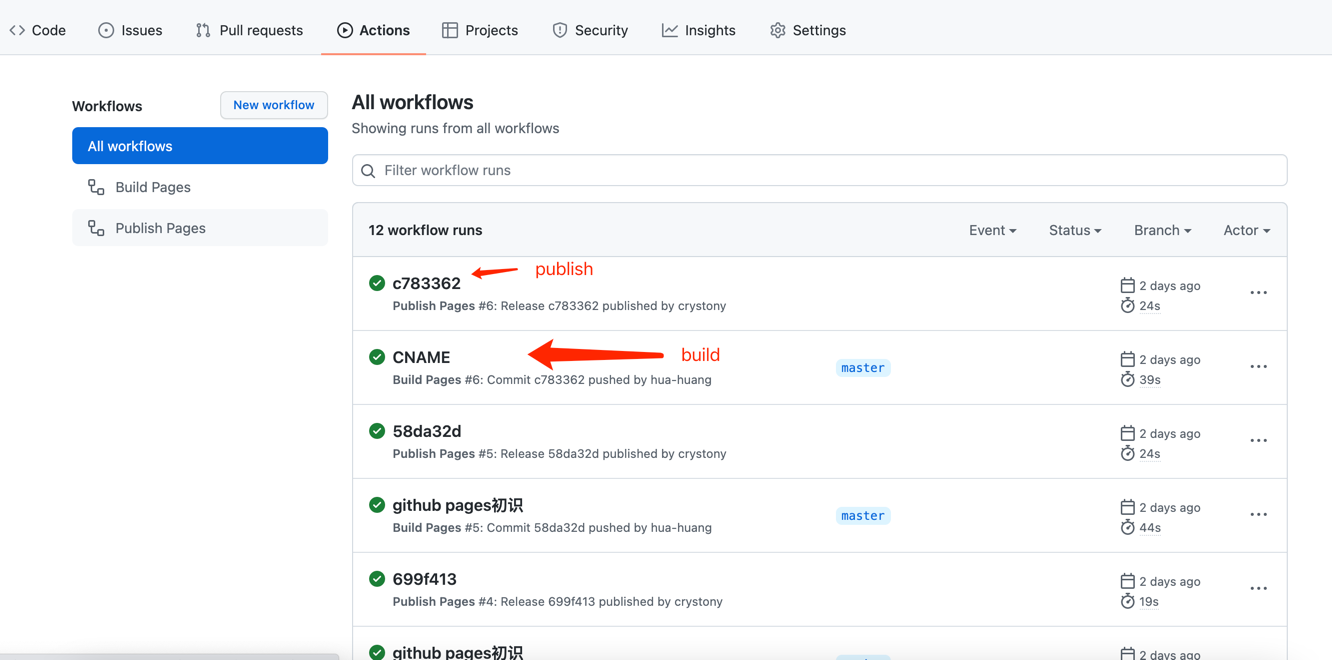
最后的代码仓库结构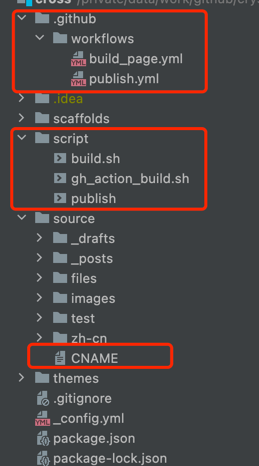
写在最后
在代码库的source目录下,有个CNAME文件,需要从网站库复制过来,后续如果有更新也要同步
否则每次 build、publish 后,网站库的CNAME文件会被冲掉,导致自定义域名失效